Revised January 2008
Sanding
Go to Main Menu
Return to Techniques Index
| After cutting to size, all parts will require a gentle sanding. This is best undertaken with a fine grade of abrasive, 240 grit being ideal, using a modern aluminium oxide material rather than the readily available yellow glass paper that tends to scratch the timber. |
| 1 - To reduce a "standard" width strip by up to 3/32" (2 mm).
If a greater amount is to be removed, then use the "cutting timber to
width" (with craft knife) technique. 2 - To smooth a rough sawn edge after sawing with the fretsaw or small circular saw. |
| Step 1 | 
|
| Step 2 |
|
| Step 3 |
|
| Step 4 |
|
| Abrasive paper |
|
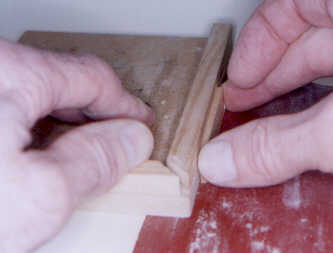
| Step 1 - Place the gluing table or rectangular block onto the abrasive paper
to just cover its edge. Note that the side of the block must be perpendicular to the work surface. | ||
| Step 2 - Hold the gluing table firmly in place with one hand.
| ||
| Step 3 - Grip the part to be sanded between finger and thumb.
| ||
| Step 4 - Press the part against the side of the gluing table
and slide it to-and-fro while pressing it down on the
abrasive. |
||
| Step 5 - Check frequently to ensure too much is not removed - it cannot be put back! |
© 2008 Neil Helsby